|
When the LIRR started picking up FA’s,
they combed the country for all available units.
SP&S FA1 units got sidelined by the Burlington Northern,
Western Maryland
had four FA2’s, and the L&N FA2 units started the show.
The last
New Haven
and NYC units came via the collapsed Penn Central.
Collecting all the FA’s and refitting them was a major
preservation coup, carried out by a railroad that didn’t realize it was
in the business of preservation! The
units all went to GE in
Bergen
,
New Jersey
, where they were rewired, tuned, and set up as HEP generators for the
Long Island
fleet. At the beginning, the
locos retained their 244 model prime movers. The traction motors were
taken out, MU receptacles placed on both ends, and the exhausts moved to
accommodate the internal structure.
Long Island Rail Road
had been absorbed by the MTA, so the units never saw grey and orange
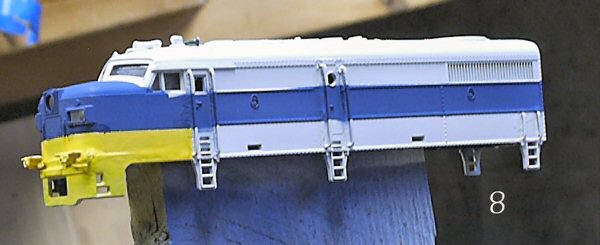
paint. They were painted in
“platinum mist” with blue stripes, but retain LIRR style numerals.
When 601, an ex-L&
N FA2
, began service, there was no yellow on the pilot, but two weeks later,
the yellow was applied to promote visibility.
Years later, some of the units were rebuilt with Detroit Diesel
“sleds” and reconfigured with some of the classic ALCO cab units
traits obliterated. I chose to
model the units as I remembered them.
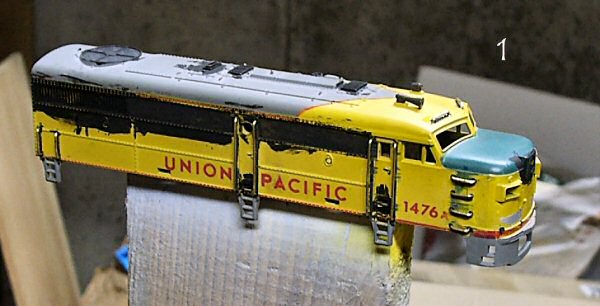
I happen to like dirty, heavily weathered locomotives.
The platinum scheme FA’s did not disappoint!
The heavily sooted ALCO exhausts stained and marred the FA power
cars almost immediately. Some
were nearly blackened by the exhaust being draped over the units as they
were pushed or dragged back and forth on endless commuter trains.
A last comment regarding the preservation of these units; It was sad to
learn of several locomotives being destroyed by fires or collisions.
I will never understand the logic behind ravaging the ex-WM #304
into a truly ugly monstrosity! We
can be grateful for the efforts of a small group of imaginative men who
purchased the remaining retired fleet brokering them out to collectors,
museums, and preservation groups. I
know of at least four units being rebuilt for operation as traditional
ALCO freight locomotives, while others remain untouched, rusting away with
little interest from the preservationists who acquired them.
I built two of these units for my Long
Island-New England model railroad. The
first was a Proto unit, complete with motor.
While the Power Cars never actually pulled a train, I wasn’t
about to remove the motor! Of
course, I could keep the motor and disengage the drive gearing, which
would be pointless but prototypical! The
second unit I modeled was a Bachman dummy unit.
Not all FA’s were created equal, and roof details were modified
after their original owners pressed them into service.
In comparison, the two units are more like “cousins” rather
than “sisters”.
|
 |
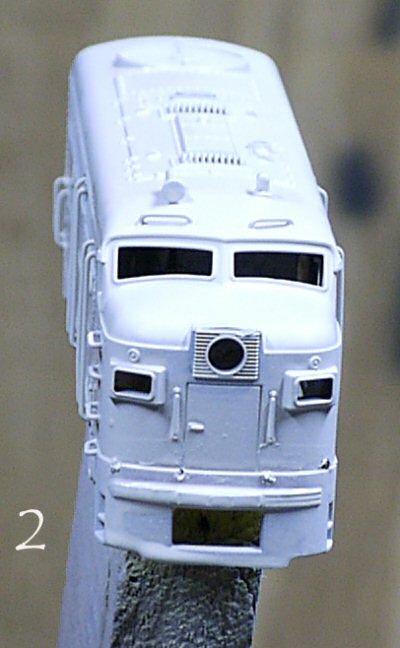
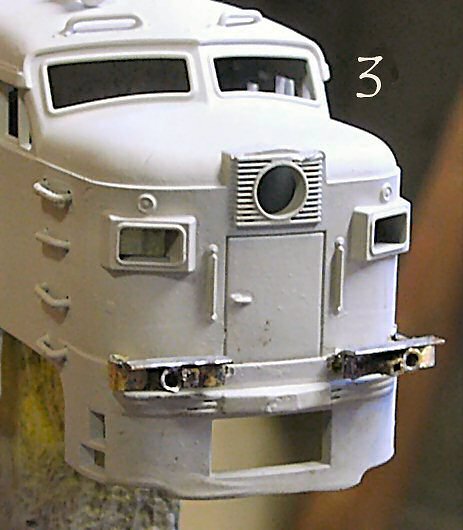
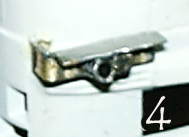
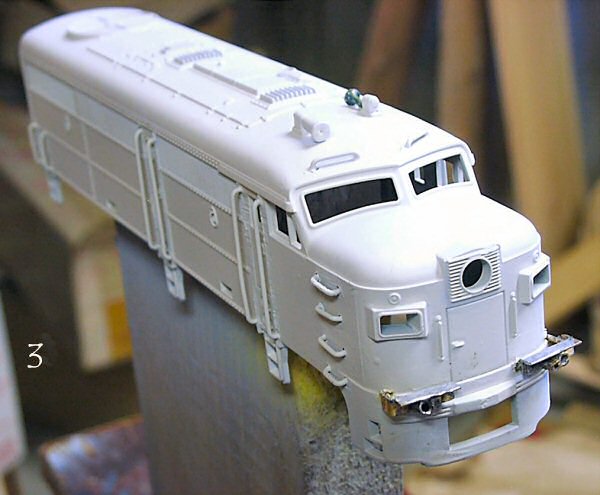
1.
I
first ground off the plastic railings and grab irons.
I made replacements from brass, drilling set holes and gluing them
with ACC (“Superglue”). Next,
I brushed Floquil engine black paint across all the grating and louvers.
If the coming paint job missed crevices, I didn’t want Union
Pacific yellow showing through! |
 |
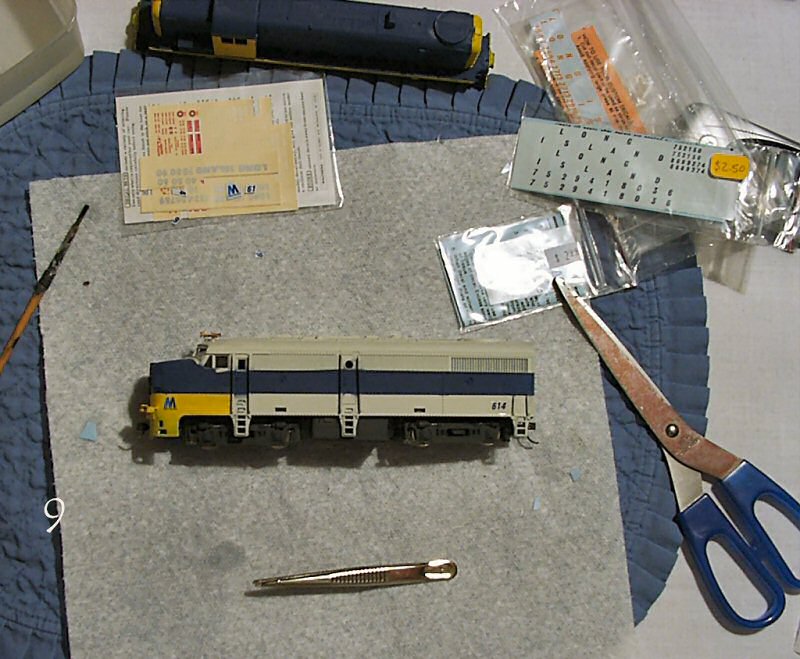
9. I waited another two days before decaling the
locomotive. I wanted the
various paint layers to harden and settle onto the units surface, but I
also needed some time to do this job without interruption.
Decaling can be a difficult
process at best, and a disaster at the worst.
I cleared an area on the kitchen table, had plenty of overhead
light, some tweezers, a clean brush, and some good scissors.
I cut the decals with a small margin around the images, then place
them in tepid water. I removed
the decal sheet before the film slips off of it’s own accord and gently
slide them into place. Once
satisfied with the placement, I soak up excess water with a torn edge of a
paper towel. When they have
begun to dry, I use a clean brush to apply Solva-Set over the decal.
Solva-Set causes the image to settle down over any bumps or raised
surface features. I let this
dry entirely on its own, not soaking up any excess liquid.
Once Solva-Set is applied you should avoid touching the decal
further. |
|
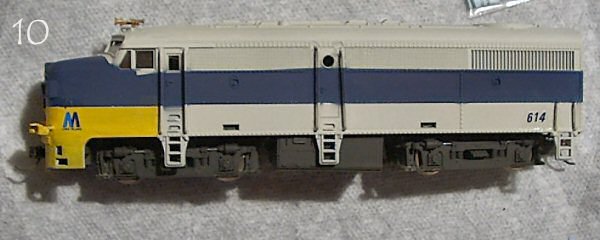
11.
I sprayed the unit with flat overcoat for several
reasons. The overcoat dulls
decal film and makes it fairly invisible to the viewer.
The flat finish darkens the intensity of the bright colors.
Another layer of clear flat coat adds a hard shield to prevent
chipping, which is essential if your H-O layout track work, like mine,
is second to collect rolling stock.
Lastly, I want to weather this unit so it has some soot and road
dirt apparent. My other unit
is heavily weathered, looking so much like I really remember them, but I
also wanted a comparison unit, since not all locomotives wear in the same
manner, depending on service and time in Morris Park |